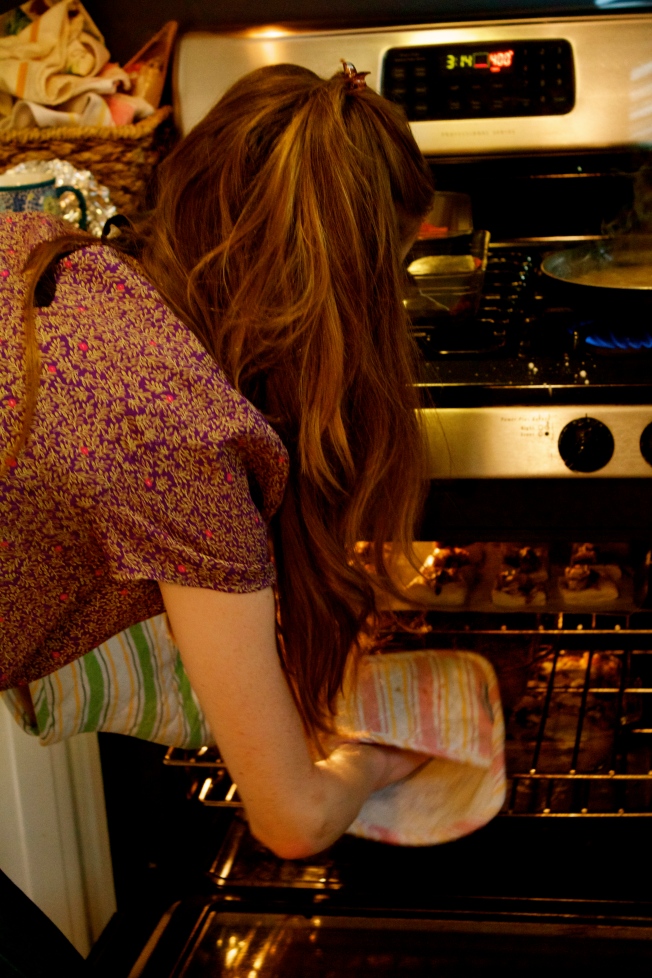
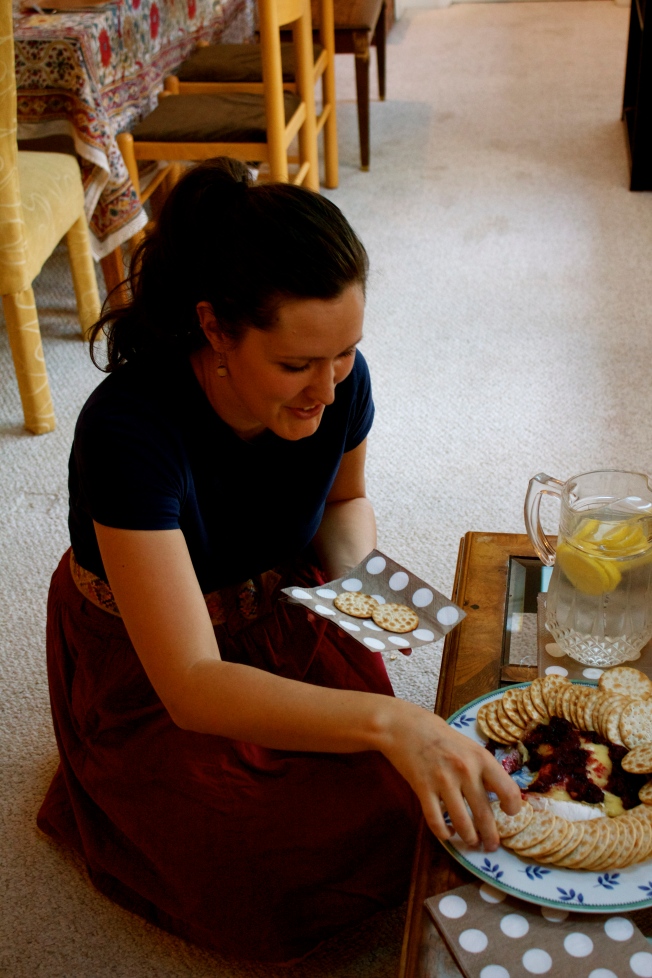
Maura Byrne before MIHI

Yesterday’s post was heavy, so before tackling forgiveness I thought I’d lighten it up a bit! I wrote a really good post for tomorrow on forgiveness today while busting out some 7 minute miles at the gym. I credit that to the three shots of espresso I had in the afternoon.

Prior to founding and launching Made in His Image I worked as a baker and pastry chef. If I didn’t learn it from my Mom I learned it from Elisabeth and Chad, owners of Tartine in San Francisco. They are incredible!! Visit their website by clicking here. Someone asked me to post my recipe for croissants. First, it is not mine, but theirs, and exceedingly detailed. Making pastries is very involved, but take your time and enjoy. It might take a few tries to get it right, but don’t be discouraged, as that is normal. The pictures in this post are of my food.

Croissants – from Tartine by Elisabeth Prueitt and Chad Robertson

Preferment:
¾ cup non-fat milk (6 ounces/150 ml)
1 Tablespoon active dry yeast (15ml)
1⅓ cup all-purpose flour (6¼ ounces/175g)

Dough:
1 Tablespoon + 1 teaspoon active dry yeast (20ml)
1¾ cup whole milk (14 ounces/425 ml)
6 cups all-purpose flour (28 ounces/800g)
⅓ cup sugar (2½ ounces/70g)
1 Tablespoon + 1 teaspoon salt (20 ml)
1 Tablespoon unsalted butter (15ml)

Roll-in butter:
2¾ cup unsalted butter (22 ounces/625 g)

Egg wash:
4 large egg yolks (2 ounces/60 ml)
¼ cup heavy cream
pinch of salt

To Make the Preferment:

In a small saucepan, warm the milk to take the chill off (between 80° to 90 °F). Pour the milk into a mixing bowl, sprinkle the yeast over the milk, stir to dissolve the yeast with a wooden spoon, and then add the flour, mixing with a wooden spoon until a smooth batter forms. Cover the bowl with cheesecloth and let the mixture rise until almost double in volume, 2 to 3 hours at moderate temperature or overnight in the refrigerator.

To Make the Dough:

First measure out all your ingredients and keep them near at hand. Transfer the preferment and then the yeast to the large bowl of a stand mixer fitted with the dough hook. Mix on low speed until the yeast is incorporated into the preferment batter, which will take a minute or two. Stop the mixer as needed and use a spatula to clean the bottom and sides of the bowl, folding the loosened portion into the mixture to incorporate all the elements fully. When the mixture has come together into an even, well-mixed mass, increase the speed to medium, and mix for a couple of minutes. Slowly add half of the milk and continue to mix until the milk is fully incorporated.

Reduce the speed to low, add the flour, sugar, salt, melted butter, and the rest of the milk, and mix until the mass comes together in a loose dough, about 3 minutes. Turn off the mixer and let the dough rest for 15 to 20 minutes. This resting period helps to shorten the final mixing phase, which comes next.

Engage the mixer again on low speed and mix until the dough is smooth and elastic, a maximum of 4 minutes. If the dough is very firm, add a little milk, 1 tablespoon at a time. Take care not to over-mix the dough, which will result in a tough croissant that also turns stale more quickly. Remember, too, you will be rolling out the dough several times, which will further develop the gluten structure, so though you want a smooth dough, the less mixing you do to achieve that goal, the better. Cover the bowl with cheesecloth and let the dough rise in a cool place until the volume increases by half, about 1½ hours.

Lightly flour a work surface. Transfer the dough to the floured surface and press into a rectangle 2 inches thick. Wrap the rectangle in plastic wrap, or slip it into a plastic bag and seal closed. Place the dough in the refrigerator to chill for 4 to 6 hours.

To Make the Roll-in butter:

About 1 hour before you are ready to start laminating the dough, put the butter that you will be rolling into the dough in the bowl of the mixer fitted with the paddle attachment. Mix on medium speed until malleable but not warm or soft, about 3 minutes. Remove the butter from the bowl, wrap in plastic wrap, and place in the refrigerator to chill but not re-solidify.

Laminating the dough:

Lightly dust a cool work surface, and then remove the chilled dough and the butter from the refrigerator. Unwrap the dough and place it on the floured surface. Roll out the dough into a rectangle 28 by 12 inches. With the long side of the rectangle facing you, and starting from the left side, spread and spot the butter over two-thirds of the length of the rectangle. Fold the uncovered third over the butter and then fold the left-hand third over the center, as if folding a business letter. The resulting rectangle is known as a plaque. With your fingers, push down along the seams on the top and the bottom to seal in the plaque.

Second turn:

Give the plaque a quarter turn so the seams are to your right and left, rather than at the top and bottom. Again, roll out the dough into a rectangle 28 by 12 inches, and fold again in the same manner. Wrap in plastic wrap or slip into a plastic bag and place in the refrigerator for 1½ to 2 hours to relax the gluten in the dough before you make the third fold, or “turn”.

Third turn:

Clean the work surface, dust again with flour, and remove the dough from the refrigerator. Unwrap, place on the floured surface, and again roll out into a rectangle 28 by 12 inches. Fold into thirds in the same manner. You should have a plaque of dough measuring about 9 by 12 inches, about the size of a quarter sheet pan, and 1½ to 2 inches thick. Wrap in plastic wrap or slip into the plastic bag, place on a quarter sheet pan, and immediately place in the freezer to chill for at least 1 hour. If you intend to make the croissants the next morning, leave the dough in the freezer until the evening and then transfer it to the refrigerator before retiring. The next morning, the dough will be ready to roll out and form into croissants, proof, and bake. Or, you can leave the dough in the freezer for up to 1 week; just remember to transfer it to the refrigerator to thaw overnight before using.

Making the croissant:

When you are ready to roll out the dough, dust the work surface again. Roll out the dough into a rectangle 32 by 12 inches and 3/8 inches thick. Using a pizza wheel or chef’s knife, cut the dough into long triangles that measure 10 to 12 inches on each side and about 4 inches along the base.

Line a half sheet pan (about 13 by 18 inches) with parchment paper. To shape each croissant, position a triangle with the base facing you. Positioning your palms on the two outer points of the base, carefully rolling the base toward the point. To finish, grab the point with one hand, stretching it slightly, and continue to roll, tucking the point underneath the rolled dough so that the croissant will stand tall when you place it on the sheet pan. If you have properly shaped the croissant, it will have 6 or 7 ridges.
As you form the croissants, place them, well-spaced, on the prepared half-sheet pan. When all the croissants are on the pan, set the pan in a draft-free area with relatively high humidity, and let the pastries rise for 2 to 3 hours. The ideal temperature is 75 °F. A bit cooler or warmer is all right, as long as the temperature is not warm enough to melt the layers of butter in the dough, which would yield greasy pastries. Cooler is preferable and will increase the rising time and with it the flavor development. For example, the home oven (turned off) with a pan of steaming water placed in the bottom is a good place for proofing leavened baked items. To make sure that no skin forms on the pastries during this final rising, refresh the pan of water halfway through the rising.

During this final rising, the croissants should at least double in size and look noticeably puffy. If when you press a croissant lightly with a fingertip, the indentation fills in slowly, the croissants are almost ready to bake. At this point, the croissants should still be slightly “firm” and holding their shape and neither spongy nor starting to slouch. If you have put the croissants into the oven to proof, remove them now and set the oven to 425 °F to preheat for 20 to 30 minutes.

About 10 minutes before you are ready to bake the croissants, make the egg wash. In a small bowl, whisk together the egg yolks, cream, and salt until you have a pale yellow mixture. Using a pastry brush, lightly and carefully brush the yolk mixture on the pastries, being careful not to allow the egg wash to drip onto the pan. Let the wash dry slightly, about 10 minutes, before baking.

Place the croissants into the oven, immediately turn down the oven temperature to 400 °F, and leave the door shut for the first 10 minutes. Then working quickly, open the oven door, rotate the pan 180 degrees, and close the door. This rotation will help the pastries to bake evenly. Bake for 6 to 10 minutes longer, rotating the pan again during this time if the croissants do not appear to be baking evenly. The croissants should be done in 15 to 20 minutes total. They are ready when they are a deep golden brown on the top and bottom, crisp on the outside and light when they are picked up, indicating that the interior is cooked through.

Remove the croissants from the oven and place them on a wire rack to cool. As they cool, their moist interiors will set up. They are best if eaten while they are still slightly warm. If they have just cooled to room temperature, they are fine as well, or you can rewarm them in a 375°F oven for 6 to 8 minutes to recrisp them before serving. You can also store leftover croissants in an airtight container at room temperature for 1 day, and then afterward in the refrigerator for up to 3 days. If you have stored them, recrisp them in the oven before serving.

Kitchen Notes: I have made several different varieties of croissants, including chocolate, cream cheese and almond filled.

“Honey are you married?”

Over the summer, when I worked as a baker, a customer approached me in my flour covered apron and pulled back hair, touched my arm and said, Honey are you married? I chuckled and said no. Well whoever you marry, he better like to exercise because you are going to make him fat with all of this good food. I almost dropped what I was holding, as we both laughed together.

As I was uploading these cookie pictures I thought of her funny remark. Well I don’t think I would ever marry anyone who doesn’t like to exercise and my cooking is good for you, so fear not wherever you are future husband.

The other evening I made some Christmas cookies. Baking is so therapeutic for me and I love to bring others joy through my baking and cooking. My favorite is to make dinner for my roommates and people I love.

This is just the beginning of my Christmas baking because I made these in Nashville.  And next week, I’m going home for Christmas and will definitely bake with my mom and little sister.

Do you want to hear something amazing? Made in His Image got its business debit card today! We are officially a business!! God the Father is breathtaking!! The card is royal blue to honor our Lady and my favorite part is the silver lettering at the bottom that reads “Made in His Image.” WOW!!! I can’t believe our name is on a business credit card. I had tears in my eyes when I held it in my hand. It’s really happening and we are almost an official 501 (c) 3 – non-profit organization!!! All the glory and honor to our Heavenly Father! I know He is going to use this ministry to save lives and show people His love and mercy.

My First Turkey

I’ve watched my mom cook a turkey for years and this year I got to do it. And the fire department didn’t even come, unlike other cooking adventures I have embarked upon. Don’t look at me, it wasn’t my fault that the sugar in the apple turnovers converted to liquid and dripped down the oven to start a fire. Or that pools of butter formed on the cookie sheet when my croissants were cooking to also drip down the oven and start a fire. It only meant I needed new cookie sheets and the fire department keeps me humble.

Let me just tell ya, I don’t think Mom’s get an adequate amount of thanks for what they do. So, if you haven’t thanked your mom for all the hard work she use to do or still does for you, go ahead and give her a call and tell her thanks. My mom always use to tell me, Maura, these are the easiest years of your life, because you are only responsible for you. But when you get married, everything changes. When I was in trauma therapy my doctor always use to say, Marriage is about getting out of yourself. I think I’ll hear his words until the day I die, as they are so firmly rooted within me now. Most mother’s do a phenomenal job at getting out of themselves and I believe it’s important for us to thank them for their sacrifice and witness.

Last Wednesday night I rinsed the turkey in cold water and made the stuffing. A friend had cubed loafs of Tuscan bread, which had been drying out on our counter for the day. I sautéed onions and celery with a dab or two of butter and tossed it with some dried poultry seasoning and chopped apples. Thursday morning I stuffed the turkey and underneath it’s skin I rubbed a mixture of fresh herbs, freshly ground pepper and salt. And in it went for five hours. Nothing burned or blow up, so all was well (not that I have ever blown anything up while cooking. I did all of my “blowing up” in Organic Chemistry in college).

Pinterest anyone?

Kathryn graciously bought these for our house on Thanksgiving!

Gerber daisies are my favorite!

Time to eat!

My beautiful roommate Tala!

I’m sorry I didn’t get pictures of the food, I was to preoccupied with trying to make sure everything would be warm at the same time. And many thanks to Kathryn Baker who took these photos. Kathryn is a second year law student at Vanderbilt, who also loves photography. You should check out her blog cameras & cowboy boots.

So, I Use to be a Pastry Chef

Prior to founding and launching Made in His Image I worked as a baker and pastry chef. If I didn’t learn it from my Mom I learned it from Elisabeth and Chad, owners of Tartine in San Francisco. They are incredible!! Visit their website by clicking here. Someone asked me to post my recipe for croissants for the upcoming holidays. First, it is not mine, but theirs and exceedingly detailed. Making pastries is very involved, but take your time and enjoy. It might take a few tries to get it right, but don’t be discouraged, as that is normal for a beginner. The pictures in this post are of my food.

Croissants – from Tartine by Elisabeth Prueitt and Chad Robertson

Preferment:
¾ cup non-fat milk (6 ounces/150 ml)
1 Tablespoon active dry yeast (15ml)
1⅓ cup all-purpose flour (6¼ ounces/175g)

Dough:
1 Tablespoon + 1 teaspoon active dry yeast (20ml)
1¾ cup whole milk (14 ounces/425 ml)
6 cups all-purpose flour (28 ounces/800g)
⅓ cup sugar (2½ ounces/70g)
1 Tablespoon + 1 teaspoon salt (20 ml)
1 Tablespoon unsalted butter (15ml)

Roll-in butter:
2¾ cup unsalted butter (22 ounces/625 g)

Egg wash:
4 large egg yolks (2 ounces/60 ml)
¼ cup heavy cream
pinch of salt

To Make the Preferment:

In a small saucepan, warm the milk to take the chill off (between 80° to 90 °F). Pour the milk into a mixing bowl, sprinkle the yeast over the milk, stir to dissolve the yeast with a wooden spoon, and then add the flour, mixing with a wooden spoon until a smooth batter forms. Cover the bowl with cheesecloth and let the mixture rise until almost double in volume, 2 to 3 hours at moderate temperature or overnight in the refrigerator.

To Make the Dough:

First measure out all your ingredients and keep them near at hand. Transfer the preferment and then the yeast to the large bowl of a stand mixer fitted with the dough hook. Mix on low speed until the yeast is incorporated into the preferment batter, which will take a minute or two. Stop the mixer as needed and use a spatula to clean the bottom and sides of the bowl, folding the loosened portion into the mixture to incorporate all the elements fully. When the mixture has come together into an even, well-mixed mass, increase the speed to medium, and mix for a couple of minutes. Slowly add half of the milk and continue to mix until the milk is fully incorporated.

Reduce the speed to low, add the flour, sugar, salt, melted butter, and the rest of the milk, and mix until the mass comes together in a loose dough, about 3 minutes. Turn off the mixer and let the dough rest for 15 to 20 minutes. This resting period helps to shorten the final mixing phase, which comes next.

Engage the mixer again on low speed and mix until the dough is smooth and elastic, a maximum of 4 minutes. If the dough is very firm, add a little milk, 1 tablespoon at a time. Take care not to over-mix the dough, which will result in a tough croissant that also turns stale more quickly. Remember, too, you will be rolling out the dough several times, which will further develop the gluten structure, so though you want a smooth dough, the less mixing you do to achieve that goal, the better. Cover the bowl with cheesecloth and let the dough rise in a cool place until the volume increases by half, about 1½ hours.

Lightly flour a work surface. Transfer the dough to the floured surface and press into a rectangle 2 inches thick. Wrap the rectangle in plastic wrap, or slip it into a plastic bag and seal closed. Place the dough in the refrigerator to chill for 4 to 6 hours.

To Make the Roll-in butter:

About 1 hour before you are ready to start laminating the dough, put the butter that you will be rolling into the dough in the bowl of the mixer fitted with the paddle attachment. Mix on medium speed until malleable but not warm or soft, about 3 minutes. Remove the butter from the bowl, wrap in plastic wrap, and place in the refrigerator to chill but not re-solidify.

Laminating the dough:

Lightly dust a cool work surface, and then remove the chilled dough and the butter from the refrigerator. Unwrap the dough and place it on the floured surface. Roll out the dough into a rectangle 28 by 12 inches. With the long side of the rectangle facing you, and starting from the left side, spread and spot the butter over two-thirds of the length of the rectangle. Fold the uncovered third over the butter and then fold the left-hand third over the center, as if folding a business letter. The resulting rectangle is known as a plaque. With your fingers, push down along the seams on the top and the bottom to seal in the plaque.

Second turn:

Give the plaque a quarter turn so the seams are to your right and left, rather than at the top and bottom. Again, roll out the dough into a rectangle 28 by 12 inches, and fold again in the same manner. Wrap in plastic wrap or slip into a plastic bag and place in the refrigerator for 1½ to 2 hours to relax the gluten in the dough before you make the third fold, or “turn”.

Third turn:

Clean the work surface, dust again with flour, and remove the dough from the refrigerator. Unwrap, place on the floured surface, and again roll out into a rectangle 28 by 12 inches. Fold into thirds in the same manner. You should have a plaque of dough measuring about 9 by 12 inches, about the size of a quarter sheet pan, and 1½ to 2 inches thick. Wrap in plastic wrap or slip into the plastic bag, place on a quarter sheet pan, and immediately place in the freezer to chill for at least 1 hour. If you intend to make the croissants the next morning, leave the dough in the freezer until the evening and then transfer it to the refrigerator before retiring. The next morning, the dough will be ready to roll out and form into croissants, proof, and bake. Or, you can leave the dough in the freezer for up to 1 week; just remember to transfer it to the refrigerator to thaw overnight before using.

Making the croissant:

When you are ready to roll out the dough, dust the work surface again. Roll out the dough into a rectangle 32 by 12 inches and 3/8 inches thick. Using a pizza wheel or chef’s knife, cut the dough into long triangles that measure 10 to 12 inches on each side and about 4 inches along the base.

Line a half sheet pan (about 13 by 18 inches) with parchment paper. To shape each croissant, position a triangle with the base facing you. Positioning your palms on the two outer points of the base, carefully rolling the base toward the point. To finish, grab the point with one hand, stretching it slightly, and continue to roll, tucking the point underneath the rolled dough so that the croissant will stand tall when you place it on the sheet pan. If you have properly shaped the croissant, it will have 6 or 7 ridges.
As you form the croissants, place them, well-spaced, on the prepared half-sheet pan. When all the croissants are on the pan, set the pan in a draft-free area with relatively high humidity, and let the pastries rise for 2 to 3 hours. The ideal temperature is 75 °F. A bit cooler or warmer is all right, as long as the temperature is not warm enough to melt the layers of butter in the dough, which would yield greasy pastries. Cooler is preferable and will increase the rising time and with it the flavor development. For example, the home oven (turned off) with a pan of steaming water placed in the bottom is a good place for proofing leavened baked items. To make sure that no skin forms on the pastries during this final rising, refresh the pan of water halfway through the rising.

During this final rising, the croissants should at least double in size and look noticeably puffy. If when you press a croissant lightly with a fingertip, the indentation fills in slowly, the croissants are almost ready to bake. At this point, the croissants should still be slightly “firm” and holding their shape and neither spongy nor starting to slouch. If you have put the croissants into the oven to proof, remove them now and set the oven to 425 °F to preheat for 20 to 30 minutes.

About 10 minutes before you are ready to bake the croissants, make the egg wash. In a small bowl, whisk together the egg yolks, cream, and salt until you have a pale yellow mixture. Using a pastry brush, lightly and carefully brush the yolk mixture on the pastries, being careful not to allow the egg wash to drip onto the pan. Let the wash dry slightly, about 10 minutes, before baking.

Place the croissants into the oven, immediately turn down the oven temperature to 400 °F, and leave the door shut for the first 10 minutes. Then working quickly, open the oven door, rotate the pan 180 degrees, and close the door. This rotation will help the pastries to bake evenly. Bake for 6 to 10 minutes longer, rotating the pan again during this time if the croissants do not appear to be baking evenly. The croissants should be done in 15 to 20 minutes total. They are ready when they are a deep golden brown on the top and bottom, crisp on the outside and light when they are picked up, indicating that the interior is cooked through.

Remove the croissants from the oven and place them on a wire rack to cool. As they cool, their moist interiors will set up. They are best if eaten while they are still slightly warm. If they have just cooled to room temperature, they are fine as well, or you can rewarm them in a 375°F oven for 6 to 8 minutes to recrisp them before serving. You can also store leftover croissants in an airtight container at room temperature for 1 day, and then afterward in the refrigerator for up to 3 days. If you have stored them, recrisp them in the oven before serving.

Kitchen Notes: I have made several different varieties of croissants, including chocolate, cream cheese and almond filled.

Chunky woolen sweaters from jcrew, warm mugs of cider and cooler weather…

these are three of my favorite things about fall. Oh and I can’t forget my six year old jcrew vest and woolen ski hat. The other day someone asked if I had stopped posting anything baking related on my blog, since I was working full-time with Made in His Image. Good question, and the answer is no, I can’t forget my roots (Hi mom). I still love to eat, cook and bake; I just don’t get to do it as much. And yes mom, I do have money to buy groceries. My mom was a little concerned (as most moms I imagine would be) when I left my job for MIHI. Not because she didn’t believe in the mission, she just wanted to make sure I was provided for. She still asks periodically if I have money for food (thanks mom, I just Trader Joe’s it up).

So, it’s officially fall, and Nashville’s weather is starting to act like it with its crisp evenings and chilly mornings. All of the local cafes’ have brought back their pumpkin spice lattes, spiced apple cider and their assortment of seasonal baked goods. To follow in the festivities of the season I thought I would post a recipe for donuts. Yep, that’s right, that would be homemade donuts. So now you can save that five dollars or more that you would spend on a dozen donuts and make them yourself. Plus if you have children, they will love it! Just don’t let them do the frying, but I think that’s common sense. I made donuts with one of the little girls I tutor and she LOVED it. She went around the block with me handing them out to her neighbors because she was so proud of herself. So, making donuts can also be a confidence builder, even better!

Yeast donut dough
3/4 cup whole milk
3 Tablespoons unsalted butter
3 1/4 cups all-purpose flour
1/3 cup granulated sugar
1/2 teaspoon salt
1 package (2 1/2 teaspoons) quick rise yeast
2 large eggs
1/2 teaspoon vanilla extract 
 
Other ingredients needed
Canola oil for brushing and frying
2/3 cup of the best quality strawberry jelly or seedless raspberry, apricot, or blueberry jam. I love the seedless raspberry the best. 
1/2 cup of superfine sugar 
 

In a small saucepan over medium heat, combine the milk and butter and heat, stirring, until the butter is melted and the mixture is hot but not boiling. Remove from the heat.

Fit a stand mixer with the paddle attachment. In the mixing bowl, combine 2 1/2 cups of the flour, the sugar, salt, and yeast and beat on low-speed to mix. Add the hot milk mixture, raise the speed to medium, and beat until well blended. Add the eggs and vanilla and beat until fully incorporated, about 2 minutes. Add the remaining 3/4 cup flour and beat until the dough is well blended and smooth, about 1 minute longer. The dough will not pull away from the sides of the bowl and will still be somewhat sticky.

Scrape the dough into a large bowl and cover with a clean kitchen towel. Let stand in a warm place until well risen and increased in bulk (it may almost double in size), about 45 minutes. Use the dough right away.

Alright here we…let’s do this, let’s make donuts.

Line a baking sheet with waxed paper and brush the paper with oil. Line a second baking sheet with paper towels.

Turn the dough out onto a generously floured work surface. Using a floured rolling pin, roll out the dough into a circle about 10 inches in diameter and 1/2 inch thick. Using a 3-inch round pastry cutter, cut as many rounds as possible. Use a wide spatula to transfer the donuts to the oiled paper. Gather up the scraps and repeat the rolling and cutting out donuts. Cover the donuts with a clean kitchen towel and let rise for 30 minutes. The donuts should look soft and puffy, but will not double in size.

Pour oil to a depth of 2 inches into a medium size pot that you would boil water in. Heat the oil until it reads 360 degrees F on a deep frying thermometer. Carefully, lower 2-5 donuts into the hot oil and deep fry until golden in color, about 1 1/2 minutes. Turn over and cook until dark golden on the second side, about 1 minute longer. Transfer to the towel-lined baking sheet. Repeat to fry the remaining donuts, allowing the oil to return to 360 degrees F between batches.

Spread the sugar on a large plate or in a wide, shallow bowl. When the donuts are cool enough to handle, roll them in the sugar to coat on all sides. Fit a pastry bag with a 1/4 inch round tip and spoon the jelly into the bag. Using the tip of a small sharp knife, cut a 1/2 inch slit in the side of each donut. Press the tip of the pastry bag gently into the slits and pipe about 2 teaspoons of jelly into each donut. Enjoy as a perfect fall treat!

Kitchen notes: If you are using raspberry jam it has to be seedless, or the seeds will get stuck in the tip you attach to the pastry bag. Make sure your thermometer is a candy thermometer, a regular kitchen thermometer will not measure up to 360 degrees F.

Granola Bars

Last night Kathleen, one of my sweet roommates showed me this recipe for Granola Bars. It’s from a blog called Homemade Incredible. Check it out homemadeincredilbe.wordpress.com.

This recipe for Granola Bars looks awesome. I’m going to try it tomorrow and will let you know how they turn out. Granola Bars are a good breakfast on the go with a Banana (or any fruit) and make very healthy and delicious snacks. I have made granola before, but never bars so I’m excited to try this out.

Here is the recipe:

  • 3 c oats
  • 1/2 c wheat germ or ground flax seed
  • 3/4 c flour or ground oats
  • 1/2 c brown sugar
  • 1/2 c walnuts
  • 1/2 c dried cranberries
  • 1 tsp cinnamon
  • 1/2 tsp salt
  • 1 c natural peanut or almond butter
  • 1 c unsweetened applesauce
  • 1/2 c honey

In a large bowl, combine oats, flour, wheat germ/flax, brown sugar, salt, and cinnamon. In a separate bowl, stir together remaining ingredients. Make a “well” in the center of the oat mixture; pour wet ingredients into well and stir together until just combined. Grease a large (13×9″) pan with butter and press mixture firmly into pan. Bake at 350 degrees for 20-25 minutes. Allow to cool, then cut into bars. I recommend freezing half the batch!

Try it and let me know how you like it!

Tartlet Pans

To answer a few email questions – I bought my tartlet pans in California at one of my favorite stores – Sur la Table. Sur la Table is a baker’s paradise, a store very similar to Williams Sonoma. I will never forget going there with my mom one sunny morning.

The most common type of tart pan is a shiny, tin-lined, removable-bottom pan with a fluted edge about 1 inch tall. It comes in a range of sizes, from individual (4 inches) to bakery-size (12 inches or larger) and in shapes from round to rectangular. Heavy-gauge tinned steel ensures even and gentle heat distribution for consistent baking and professional-quality results.

You can also find tartlet pans in myriad sizes and styles that are great for buffets, teas, and other occasions when a tiny all-to-yourself dessert is just right. Be careful when removing filled tart pans; hold them by the sides, rather than the removable bottom (if they have one).

Ceramic tart pans are a beautiful choice when you want to present your tart in its baking pan, though the tart may need to bake longer than the recipe specifies due to the poor heat conductivity of ceramic.

Sur la Table sells their tartlet pans for $4.00 a piece (for the 4 in.) I checked William Sonoma and they sell a set of 6 (4 in) for $23.00, if you don’t have to pay shipping and can go to a store to pick them up that is not a bad price at all. I would NOT buy these pans at a regular grocery store. I have done that before for other speciality pans and they were not properly made at all and I ended up ruining an entire catering job. And it cost me twice the amount of money in ingredients because I had to remake the dessert.

Here is the link to Sur la Table: http://www.surlatable.com/product/PRO-7404/Gobel-Nonstick-Tartlets

And here is the link to Williams Sonoma: http://www.williams-sonoma.com/products/gobel-nonstick-mini-round-tart-pan/?pkey=cpie-pans-tart-pans

I hope you all have fun with this! Enjoy! And please let me know how they turn out – I know they will be delicious. Send me an email if you run into any questions while making the tarts, I would love to answer any questions at all.

Fruit Tarts

In regards to my limited skill as a baker – if I didn’t learn it from my mother I learned it from Pastry chef Elizabeth Prueitt and her husband, renowned baker Chad Robertson. They are both the co-owners of Tartine Bakery in San Francisco. They both trained in the Culinary Arts at the Baking and Pastry schools of the Culinary Institute of America in Hyde Park, New York. Elisabeth and her husband Chad traveled, trained and cooked in France and upon their return opened Bay Village Bakery in Point Reyes Station, California, which eventually turned into Tartine Bakery. Tartine Bakery has been rated in the Zagat Survey as Best Bakery and Best Breakfast in San Francisco. Elisabeth and Chad were nominees for the 2006 James Beard Outstanding Pastry Chefs, National award.

Many people have asked me to post my fruit tart recipe. The recipe that I use is from Tartine by Elisabeth and Chad. It follows. The pictures in this post are of my tarts, taken during my countless experiments.

I would like to note that although this recipe looks a bit daunting on paper it really isn’t. Just take it one step at a time, and have fun with it.

Fresh Fruit Tart

The fresh fruit tart, the most basic of bakery tarts-a sweet pastry shell filled with pastry cream and topped with seasonal fruit.

Fully baked and cooled sweet tart dough- recipe follows

Pastry cream, cold- recipe follows

2 to 4 cups of fruit, sliced or whole, depending on the type

3 Tbsp Apple jelly or apricot jam

Kitchen notes: Pick the ripest and most gorgeous fruit that you can find. It is best to use soft fruits that will easily give to the bite, such as peaches, certain tropical fruits, and berries, rather than crisp plums or apples. The fruits that make the most compelling looking tarts deliver variety in their shape, color, and texture. Finally one way to finish a berry tart beautifully when you don’t want to glaze it is to drizzle honey lightly from a spoon. The honey will pool into tiny beads and sit on the fruit like morning dewdrops, or dust with confectioners sugar.

Have a tart shell ready for filling. Spoon the pastry cream into the tart shell and smooth the surface with a rubber spatula. You may need all of the pastry cream. The amount you need will depend on the depth of the shell and how much fruit you are using. You don’t want to fill the shell to the top, as the weight of the fruit can cause the pastry cream to overflow the rim, making slicing difficult. The shell should be about three-fourths full. Top with the fruit.

Glaze the fruit is using cut fruit. In a small saucepan, warm the jelly or jam over low heat just until it is liquid to make a glaze, and then strain through a medium- mesh sieve if using jam. Brush the glaze over the fruit. The tart can be eaten right away, or you can store it in the refrigerator for up to 2 days. If it is kept longer than that, the filling will eventually make the pastry shell soft. Serve it cool.

Sweet Tart Dough

Yield four 9 – inch tart shells or twelve 4 – inch tartlet shells

This recipe is used for most of the tart shells made at Tartine in San Francisco. It is from a bakery in the south of France where Chad Robertson and his wife Elisabeth Prueitt worked. This is the same recipe that just about every cooking-school student learns in France, and what most pastry shops and restaurants use, with minor variations. Like so many recipes in baking, there are few secrets here. Rather it is in the individual baker’s touch that makes each product unique.

Ingredients:

1 cup + 2 Tbsp Unsalted butter, at room temperature

1 cup sugar

1/4 tsp salt

2 Large eggs, at room temperature

3 1/2 cups All-purpose flour

Egg wash (optional)

1 large egg

A pinch of salt

This is also a dough that a baker would say “behaves well,” meaning that it can be rolled very thin, it is easy to handle, and it bakes beautifully, holding its shape without slumping down into the tart pan like some doughs do. It also may be rolled out multiple times without losing its quality. One trick that we employ at the bakery is to brush egg wash lightly on the bottom and sides of partially baked shells. This thin coating seals the shell, creating a barrier that will keep the crust crisp longer.

Kitchen notes: Eggs can be brought to room temperature quickly by placing the in a bowl and running lukewarm water over them for about 5 minutes. Any leftover dough can be used as a simple cookie dough. This dough keeps exceptionally well, so make some for use now and freeze the rest for future use (it will keep for up to 3 weeks), either in disks or in rolled out rounds. If you roll out all the rounds to freeze for future use place a sheet of parchment or waxed paper between them to prevent them from sticking to one another when you thaw them.

Use a stand mixer fitted with the paddle attachment, combine the butter, sugar, and salt and mix on medium speed until smooth. Mix in 1 egg. Add the remaining egg and mix until smooth. Stop the mixer and scrape down the sides of the bowl with a rubber spatula. Add the flour all at once and mix on low speed just until incorporated.

On a lightly floured work surface, divide the dough into 4 equal balls and shape each ball into a disk 1/2 inch thick. Wrap well in plastic wrap and chill for at least 2 hours or overnight.

To line a tart pan, place a dough disk on a lightly floured surface and roll out 1/8 inch thick, rolling from the center toward the edge in all directions. Lift and rotate the dough a quarter turn after every few strokes, dusting underneath as necessary to discourage sticking, and work quickly to prevent the dough from becoming warm. Cut out a circle 2 inches larger than the pan. If the dough is still cool, carefully transfer the circle to the pan, easing it into the bottom and sides and then pressing gently int place. Do not stretch the dough, or the sides will shrink during baking. If the dough has become too soft to work with, put it in the refrigerator for a few minutes to firm up before transferring it to the pan. If the dough develops any tears, just patch with a little extra dough, pressing firmly to adhere. Trim the dough level with the top of the pan with a sharp knife. Place the pastry shell in the refrigerator or freezer until it is firm, about 15 minutes.

If you are making tartlet shells, roll out the dough in the same way, cut out circles according to the size of your pans, and line the pans. The rest of the dough, including the scrapes, can be frozen for future use.

Preheat the oven to 325 degrees F.

Dock (make small holes in) the bottom of the tart shell or tartlet shells with a fork or the tip of a knife, making tiny holes 2 inches apart. Place in the oven and bake for 7 to 10 minutes for a partially baked large shell or 5 to 7 minutes for tartlet shells. The pastry should be lightly colored and look dry and opaque. Check the shell(s) during baking and rotate the pans if necessary for even color. If you want to brush the shell(s) with a glaze,  beat the egg with the salt in a small bowl. A minute or two before the desired color is reached, remove the shell(s) from the oven and lightly brush the bottom and sides with the glaze. Return the shell(s) to the oven and bake until the desired color is reached and the glaze is set.

For a fully baked shell, proceed as directed for a partially baked shell, but bake until golden brown, about 5 minutes longer.

Let cool completely on wire racks. The pastry shells will keep, well wrapped, in the refrigerator for up to 1 week or in the freezer for up to 2 weeks.

Pastry Cream- yields 2 1/2 cups

This recipe calls for whole eggs, which makes a lighter cream than some traditional French versions that call for only egg yolks. Ig you like a richer cream, use 4 yokes instead of the 2 whole eggs in this recipe.

Ingredients:

2 cups Whole milk

1/2 vanilla bean

1/4 t salt

3 to 4 Tbsp of Cornstarch

1/2 + 1 Tbsp sugar

2 Large eggs

4 Tbsp Unsalted butter

Kitchen Notes:

While the milk is heating, the milk solids want to adhere to the bottom of the pan, so make sure to whisk or stir the milk well every now and again. If any burn spots appear on the bottom of the pan, they can flavor the entire batch of milk. Taste the milk if you see any spots and discard it if it has an acrid flavor. There is no rescuing burned milk. The biggest concern when making pastry cream is to keep the eggs from curdling. There is a fine line between when the pastry cream has cooked long enough to be properly thick and a moment later when it has cooked too long and the eggs have developed a grainy, curdled look. If the cream is only slightly grainy, use an immersion blender or a countertop blender, although this solution doesn’t always save the batch. Never use an aluminum pan for pastry cream. The yolks react with the metal and turn the cream gray. Have a lightly dampened kitchen towel on hand to help stabilize the bowl of eggs as you whisk the milk into it, freeing both of your hands for pouring and whisking.

Have a bowl ready for cooling the pastry cream with a fine- mesh sieve resting in the rim.

Pour the milk into a heavy saucepan. Split the vanilla bean half lengthwise and use the tip of a sharp knife to scrape the seeds from the pod halves into the milk. Add the salt, place over medium- high heat, and bring to just under a boil, stirring occasionally and making sure that the milk solids are not sticking to the bottom of the pan. The larger the batch, the more careful you need to be.

Meanwhile, in a mixing bowl, whisk together the cornstarch and sugar. Use the larger amount of cornstarch for a firmer pastry cream. Add the eggs and whisk until smooth.

When the milk is ready, slowly ladle about one-third of the hot milk into the egg mixture, whisking constantly. Pour the egg-milk mixture back into the hot milk and continue whisking over medium heat until the custard is as thick as lightly whipped cream, about 2 minutes. In order for the cornstarch to cook and thicken fully, the mixture must come just to the boiling point. You want to see a few slow bubbles. However, if the cream is allowed to boil vigorously, you will curdle the pastry cream. Remove from heat and immediately pour through the sieve into the bowl. (If the custard stays in the hot pot, it will continue to cook). Let cool for 10 minutes, stirring occasionally to release the heat and prevent a skim from forming on top.

Cut the butter into 1 Tablespoon pieces. When the pastry cream is ready (it should be about 140 degrees F), whisk the butter into the pastry cream 1 tablespoon at a time, always whisking until smooth before adding the next tablespoon.

To cool the cream, cover the bowl with plastic wrap, pressing the wrap directly onto the top of the cream (the plastic wrap prevents a skin from forming on the surface). To cool it very quickly, place it in a shallow dish and press plastic wrap on top. Be careful whisking the cream once it is cold. Over mixing will break down the starch and thin the cream. Pastry cream will keep, well covered, in the refrigerator for up to 5 days.

Tuesday’s Cooking Lesson

Each week I bake with a little girl that I take care of. This week we made homemade pasta, but I didn’t have a camera on me so I couldn’t take pictures. But the week before we  made some good ole’, sure to please chocolate chip cookies. We used the simplest, yet one of the best recipes that I’ve been making since I was a little girl. The recipe that I use is right on the back of the Ghirardelli chocolate chip bag.

Ingredients:

  • 2 1/4 cups all-purpose flour
  • 1 teaspoon baking soda
  • 1 teaspoon salt
  • 1 cup (2 sticks) butter, softened
  • 3/4 cup granulated sugar
  • 3/4 cup packed brown sugar
  • 1 teaspoon vanilla extract
  • 2 large eggs
  • 2 cups of Ghirardelli chocolate chips
Directions:
Preheat oven to 375° F.
Combine flour, baking soda and salt in small bowl. Beat butter, granulated sugar, brown sugar and vanilla extract in large mixer bowl until creamy. Add eggs, one at a time, beating well after each addition. Gradually beat in flour mixture. Stir in morsels and nuts. Drop by rounded tablespoon onto ungreased baking sheets.
Bake for 9 to 11 minutes or until golden brown. Cool on baking sheets for 2 minutes; remove to wire racks to cool completely.

A Few Bakery Pictures

I’m getting a new camera and I’m so excited. Lately, I’ve been reading a lot about photography and look forward to dabbling more with my new-found hobby. Besides the professional pictures of my food, most of my pictures on my blog have been taken with my blackberry. I know right? Time for a good camera. My sister Clare “borrowed” my camera when she walked the Camino two summers ago and I haven’t seen it since. I don’t mind at all though, because half of the J.crew shoes in my closet are hers, among other things. I love having a sister to share things with.

I was just going through some old pictures and cleaning up some files and came across these from the bakery that I wanted to post.

Blueberry Lavender mini cupcakes prior to being iced for a special order.

That week we made over 1,000 cupcakes.

Mini Cinnamon Espresso Cheesecake Bites